Monday, 30 April 2012

Pssst!........I've found a great supplier for sushi ingredients........its a shop called 'Garlok' 111 Brentwood High Street. Tel: 01277 410655

sushi ingredients

To all sushi lovers....you can now make your own.  I made some today for lunch and I got my rolling mat, nori seaweed, wasabi paste, mirin, sushi ginger and sushi rice from the brilliant shop 'GARLOK' at 111 The High Street, Brentwood, Essex.  Tel: 01277 410655 Its a little haven for Oriental food lovers.

sliced veg for filling


rolling the sushi


I used various filling of;  prawn, avocado and yellow pepper,
                                   egg omelette and asparagus
                                   smoked salmon and cucumber


I need to perfect my rolling and cutting technique but it tasted great all the same.

sushi in the sunshine


It was great having sushi in the garden today, there wasn't a cloud in the sky.  

Sunday, 22 April 2012

Stilton and pear crumpets


If you love Stilton, here's a simple and quick recipe you might like to try.

Stilton and pear crumpets
© Linda Edmonds (the cookery Angel)

ingredients (serves 2 for lunch or 4 for starter)

4 crumpets
2 very ripe pears
150 grams strong Stilton
chopped fresh parsley
rapeseed oil (or use extra virgin olive oil instead)
freshly ground black pepper


method

Pre-heat the grill on a medium setting.  Place crumpets on a grill pan, quick tip: put baking paper or foil on grill pan to save washing up as the melted cheese goes everywhere.


Wash and peal the pears then slice into quarters lengthways. Remove the core and chop into pieces.  Add a layer of pears onto the crumpets and sprinkle with parsley. 

 
Add pieces of Stilton and drizzle with rapeseed oil.  Season with freshly ground black pepper.

Place under the grill for about 7 - 10 minutes or until the cheese has melted.

Serve on a bed of watercress 


© Linda Edmonds (the cookery Angel)


This is a firm favourite in our house and it's very quick and easy to make.


'sherry trifle extra jam'

On a recent trip to my wonderful local farm shop, Calcott Hall in Brentwood, Essex.  I spied this little gem on a very inviting display at the check out counter ..... Sherry Trifle Extra Jam!  


Like a kid who had to bag the sweeties I couldn't resist popping it into my trolley.  

It's by a company called Cottage Delight Speciality Foods and is from 'The Great British Pantry' range.  It was £3 for a 340 gram jar, containing 45 per cent fruit per 100 g (raspberries and strawberries) plus sherry and vanilla.  Gluten free and suitable for vegetarians.

One of my top five favourite desserts is 'sherry trifle' so I couldn't wait to give it a taste test.  I took a spoonful and my mouth was tantalised with bursts of sweet, juicy, fruity vanilla and caramel flavours.  Not quite the sherry hit I thought it would have but delicious all the same.  I decided that I'd simply have to bake some scones to give it a proper taste test (any excuse).  

So today I baked my all time favourite scone recipe, 'Delia Smith's buttermilk scone recipe'

scones, basted in buttermilk just before baking

They are so quick and easy to make and the buttermilk gives the scones a very light texture.
 

...... the aching wait for scones to cool
 

I put a teaspoonful of  'Sherry Trifle Extra Jam' on each scone and then a heaped teaspoon of clotted cream - well it would have been rude not to ;)

My mouth was watering ...............  


I hastily added some fresh raspberries and strawberries to give kind of trifle effect - scone being the cake element etc - see where I'm going with this.   I nearly scoffed one before I took photo as I'm a sucker for scones.  

It was worth the wait as the combination really worked.   I had some taste testers and their comments regarding the jam were:

'the jam was yummy'

'very tasty'

'I got a hint of sherry'

'slight sherry taste'

'sweet caramel fruit flavour'  

Everyone loved the jam and although some of the taste testers thought it didn't have the full on sherry trifle flavour they expected, it was absolutely delicious.   

I personally will be buying some more on my next visit to Calcott Hall Farm shop.  That's if it hasn't sold out as Calcott Hall has said it was proving to be  popular indeed.


Sunday, 15 April 2012

a copious amount of cake was consumed during the making of this blog


At last!  I've bitten the bullet! Two weeks ago today I started my first ever blog.  

I'll be blogging about one of the many things I love in life............ cooking! Whilst sharing my recipes, top tips and food gossip.

I've already blogged about my Jane Asher Home Baker of the Year award winning recipe for tipsy blackberry & apple cupcakes   (I even got a little mention in 'Country Life') see piccie of Jane holding my winning cupcake here

Also, my Emma Bridgewater  prize winning recipe for spineta pepper pie.

Last Friday, the highly recommended Claire Mackaness (a lady of many work talents) came to my house and gave me one on one blog training.

I'm a complete technophobe and get into a total tizz when dealing with computer stuff.   Claire's patience with my flapping about was never ending. Though I think plying her with clotted cream scones eased the way.  I've come to the conclusion that computer work requires .............. copious consumption of cake!

Friday, 13 April 2012

sauted garlic

During the next few months as my blog grows and the recipes keep on coming, there's going to be certain elements of my cooking style that you will see repeated which I've called 'top tip'  I'll refer back to these many, many times.  You can follow them too, by using my list of labels on the left hand side of my blog. 

Check them out, recipes, starters, mains, puddings and cakes with loads more coming soon.  

So today's 'top tip' is .......


sautéed garlic (for extra tasty garlic dishes) 


I use sautéed garlic in salad dressings, pizzas, pastas garlic bread etc.   

Separate the garlic cloves (keep the skins on as this will prevent burning).

In a pan add 1 - 2 tablespoons of olive oil and gently sauté the required amount of garlic for your recipe.  Make sure the heat is on lowest setting at all times as you do not want to burn the garlic as this will make it bitter.  

After about three minutes turn your garlic cloves over so they cook through evenly.  If the oil starts to sizzle or the skins start to colour turn off the heat and the garlic will sauté in the residual heat.  This usually takes about 5 - 8 minutes, depending on the size of your cloves.  You can test with the tip of the knife to see if the garlic is soft. 


Once the garlic is soft scoop it out of the pan with a metal spoon and place on a board.  Remove the skins by pressing a knife on one end of the clove - the garlic should just slip out.  This can be chopped or put through a garlic press.

This method gives a lovely flavour to the garlic and is well worth the effort.  I usually make 'sautéed garlic' whilst I'm prepping the food for the dish I'm about to make ie: pasta sauce, salad dressing or garlic bread.  The oil the garlic has been sautéing in can be used for this also.

Sunday, 8 April 2012

spineta pepper pie (serves 4) my 'Emma Bridgewater' prize winning recipe


This is my prize winning recipe called 'spineta pepper pie' and the lovely pottery star bakers in the photo were part of my prize in a recipe competition  Emma Bridgewater Pottery ran a while back.

There's a lovely story about how I devised this recipe and I have added it as a footnote below.
 
When I make this for non-meat eating visitors even the carnivores can't keep their hands off it! 
  
Spineta pepper pie
© Linda Edmonds (the cookery Angel)

ingredients 

450g fresh spinach (washed)
200g feta cheese
3 peppers
3 salad onions (thinly sliced)
50g sun blush tomatoes in their oil
handful of chopped fresh mixed herbs (dill, mint and parsley)
packet of filo pastry
75g butter (melted)
1 large free range egg (beaten)
2 tablespoons of olive oil
squeeze of lemon juice
sprinkle of sesame seeds
pinch of dried chilli flakes
salt and lots of freshly ground black pepper
grated fresh nutmeg
1 veg stock cube (type you can crumble like oxo)


method

Cut the mixed peppers in half, remove and discard the seeds, stalks and white parts. Slice the peppers into strips. Char-grill the peppers on a skillet or dry frying pan. Place peppers into a bowl, add the sun blush tomatoes, olive oil, dried chilli flakes, 1/2 of the stock cube, season with salt and pepper then cover with cling film. This will help steam the peppers so they become softer.


Meanwhile, pre-heat oven 180c (160c fan assist /350f/gas mark 4).
Steam spinach until the leaves wilt, then using a sieve, drain and squeeze out as much excess water as possible.  Put spinach onto a board, chop well and put it into a bowl.  Crumble into the spinach the rest of the stock cube, season with freshly ground black pepper and a good grating of nutmeg. Add a squeeze of lemon juice and mix well. 


Crumble the feta cheese into spinach mixture, add the salad onion and fresh herbs, then taste and add a little salt if required.  Add the egg and combine well.
 
Brush the inside of the baker with melted butter and add a layer of filo pastry then brush lightly with butter. The pastry will overlap the edges of the dish. Repeat layers 3 times. 
 
Add the spinach mixture over the filo layers and spread evenly. Strew the char-grilled peppers over the spinach layer then add remaining layers of filo as before.
 
Fold over the overlapping filo layers and brush with melted butter. Sprinkle sesame seeds over the pastry.


Bake in the centre of the oven for 20 – 25 minutes or until the pastry is golden brown.


Cut into portions and serve with a large Greek salad.
The spineta pepper pie can also be served cold and is great for picnics.


© Linda Edmonds (the cookery Angel)

Enjoy x 


Footnote

here's the story behind the recipe above ....


Before I met my husband Ian, his mum gave him a recipe for a spinach pie to use in a restaurant he used to work in.  It was based on a Greek dish called 'spanakopita pie'.  They used it on their menu and I can remember eating it once when I started working there and I never forgot the flavour.

Then one day when Ian and I were on holiday in Halkidiki, Greece, we walked by a lovely little bakery and I said 'I wonder of they have any spanakopita pie in there?'. 

We wandered into the bakery and searched their wares but could see no spanakopita pie.  We bought some delicious baklava and I asked the young boy serving us if they ever sold the dish.  He spoke in broken English and said 'no we never sell it but my grandmother makes the best spanakopita pie'.

The very next day we walked by the bakery once again and saw a huge tray of spanakopita pie.  We rushed to buy some and the boy beamed at us and said his grandmother had made it because we had asked about it.  We bought two huge pieces of it and ate it on the beach for our lunch.  It was divine.  We went back for more the next day but it had sold out and were told his grandmother would be making some more as it was so popular.

When we returned from our holiday I decided to make my very own version of the dish.  I added peppers and sunblush tomatoes etc as a little extra but my recipe can used without this addition.

Years later I entered my recipe for 'spineta pepper pie' into an Emma Bridgewater cookery competition and I won a set of three fabulous 'Starry Skies Bakers' (two seen in photos above). 


Just thought I'd share this story with you as its amazing how recipes can be inspired.   


Wednesday, 4 April 2012

rhubarb and ginger ice cream


One of the many things I love in life is ...... home made ice cream.   

Many moons ago I was given a gift of an ice cream maker.  Not the stand alone refrigerated type but one that you put the insulated part in the freezer type.   I can honestly say it's one of the best kitchen gifts I've ever received as I have used it to make countless amounts of ice cream.  

Ice cream can be so easy to make - if you can make a smoothie then you can make ice cream!   This recipe is not 'custard based' nor does it contain eggs as in a lot of ice cream recipes.   It contains yoghurt so is almost a frozen yoghurt.

I devised this ice cream recipe recently when I was trying to decide on a dessert for special Mothers Day meal I was cooking for my mum and mother-in-law.  I served it with home made vanilla shortbread and a rhubarb coulées.  If you'd like to give the ice cream a go  here's the recipe. 


rhubarb and ginger ice cream
© Linda Edmonds (the cookery Angel)


ingredients

400 grams fresh rhubarb
170 grams Greek yoghurt (full fat)
170 ml double cream
120 grams golden castor sugar
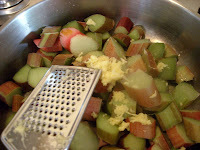
thumb sized piece fresh root ginger (about 25 grams peeled and grated)
1 tablespoon fresh lemon juice
1 teaspoon Madagascar vanilla extract


method

Wash the rhubarb and cut into 1cm thick slices then place into a large pan.  Add castor sugar, grated fresh ginger and lemon juice then put the lid on pan.   Simmer for around 15 minutes, stirring now and then.  Once the rhubarb has completely softened, turn off the heat.  

Transfer to a mini processor (or use a hand blender in the pan, but be careful not to lift the blender up once turned on or you may get splattered).  Blend to a very smooth purée.  


Rhubarb varieties can vary - once cooked it can resemble anything from pink too a rather sludgy green colour!  Never fear, I've been known to resort to adding a few drops of pink food colouring (heathen I know but I'd rather that than an 'unmentionable' coloured ice cream).  I have found the 'champagne' rhubarb variety to keep its colour beautifully though.  

Let the rhubarb purée cool completely then transfer to the fridge.  The purée needs to be very cold before the next step.  I sometimes prep the rhubarb the day before I need it.


In a large jug add Greek yoghurt and double cream.  Whisk together with a fork, add the cold rhubarb purée and vanilla extract.  Whisk until completely mixed.


Pour mixture into the ice cream maker and churn for around 35-45 minutes.   It can be eaten straight away if you like it 'soft set' but I prefer to transfer into an airtight container and freeze for at least two hours before serving.  Once completely frozen remove container from freezer five minutes before serving.


Enjoy!


© Linda Edmonds (the cookery Angel)